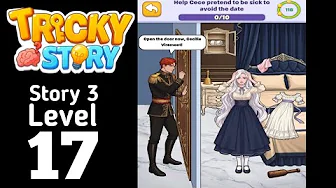
Play walkthrough Same level number. Same scene? Check the opening frame against your game. If the scene is different, try an alternate video when available or check your collection .
A LITTLE HELP AT A TIME How to solve this scene Source-based instructions from trickystory.com . Reveal the steps as you need them; the video helps show the exact movement.
0 of 10 steps revealed Reveal all answers
01 Reveal step 1 02 Reveal step 2 03 Reveal step 3 04 Reveal step 4 05 Reveal step 5 06 Reveal step 6 07 Reveal step 7 08 Reveal step 8 09 Reveal step 9 10 Reveal step 10 Show the next step Pick up the heavy metal iron chain on the floor (Progress 1/10): Observe the wooden floor below the front door, a thick metal anti-theft iron chain is lying horizontally. Click and hold this iron chain to lift it from the ground. Use iron chain to wrap and deadlock central door double-open handles (Progress 2/10): Drag the just-obtained iron chain upward and precisely throw it on the golden metal door handles of the central double wooden doors to wrap it firmly circle by circle. Extract the gray large copper lock that fell below iron chain (Progress 3/10): Click below the iron chain's original position, a gray heavy-duty large copper lock is placed on the floor. Hold it in hand to prepare to complete core physical locking. Hang copper lock on iron chain to completely lock door (Progress 4/10): Drag the obtained gray large copper lock upward and precisely fasten it at the cross intersection of the metal iron chain wrapped around the door handle in Step 2. The copper lock will automatically close and lock, jamming the door middle seam to prevent tentacles from further encircling. Move the white drawer below left tall vintage large wardrobe (Progress 5/10): Click the white panel carved large wardrobe standing on the left. Click to pull open the first drawer at the bottom layer, pull it out and throw it on the ground. Move the lower office wooden table to block door left wing (Progress 6/10): Click the red wood office long table leaning against the wall to the right of the wardrobe. Press and hold the table and move it 1 meter to the right, heavily pressing it on the shaking wooden door left side gap as a temporary blocking roadblock. Take down the reindeer head decoration hanging on upper left white brick wall (Progress 7/10): Move your gaze to the upper left height, a three-dimensional reindeer skull wall decoration with sharp antlers is hanging on the wall. Click with your finger and pull it down from the wall, drag and precisely stuff it into the central black broken hole in the left wall that was broken through by tentacles, jamming the left wing tentacles. Pull down the righteous knight long sword hanging on right white wall (Progress 8/10): Look at the right side. On the white wall to the right of the antique oil painting, a silver metal knight long sword is hanging with cross iron hooks. Click the long sword to take it down to prepare as a physical slashing tool. Use long sword to horizontally slash the swaying green large tentacle (Progress 9/10): Drag the obtained silver long sword to the thickest green tentacle twisting crazily above the door. Swipe left and right crazily 2 times with your finger on it (Swipe Left/Right) to cut the tentacle in two with one sword, making it painfully retract outside the door. Click the tall green plant pot on the right to complete final defense (Progress 10/10): When all 9 core defense lines of iron chain locking door, copper lock falling lock, wooden table propping door, deer antlers blocking hole, and long sword cutting tentacles are in place (progress reaches 9/10's highest point), click the golden pot green leaf large potted plant standing at the wall root behind the blue single long chair in the lower right corner. Press and hold the pot and move it entirely to the lower left corner, jamming it dead at the door bottom dead corner grid on the right side of the large door (progress reaches 10/10). The wooden door stops shaking, tentacles completely retreat. Cecilia escapes life danger, slumps on the ground and breathes a sigh of relief! About this walkthrough Collection: Story 3 · Level 16. Source links checked September 10, 2026. Written steps are reproduced from the owner-authorized guide; they have not been independently verified by replaying this level.
PREVIOUS GUIDE Story 3 · Level 15 NEXT GUIDE Story 3 · Level 17